Documents 4.c: Project management
From eTwinning
Back to Unit 4
Contents |
How to add a new partner to the project
You can add as many partners as you like to your project. However, bear in mind how the work will be distributed so that everyone takes part. Since the initial planning of the project, you should expect the approximate number of partners who can take part and, if possible, make everyone participate in the project. In any case, before adding a new partner you should check with the members of the project to get their approval.
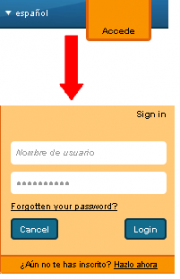
1.- Access your Desktop using your user name and password.
SNA
SCA
2.- You will see your Desktop. Go to the part that is circled in green, where it says 'Projects'; click there.
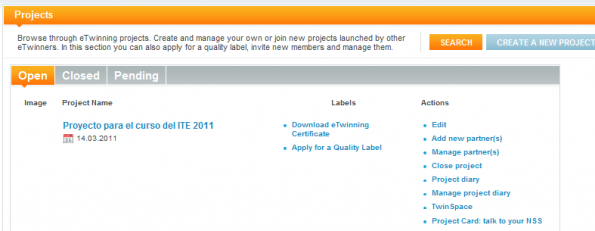
3.- You will see this page.
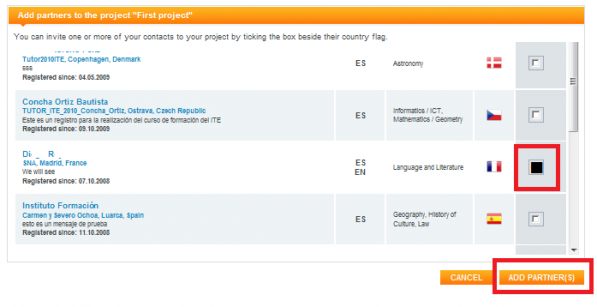
4.- Next to the project title you will see all these options. Check 'add new partners'. Click on the second row. You will see a contact list showing the contacts you have already selected to add them to your project. E.g. Di....R.... To the right of the page you will see the action column and a white box in Di....R.'s row; click there and don't forget to click at the bottom, where it says ADD PARTNERS. Should you wish to have several partners, tick all of them and click ADD PARTNERS.
5.- This is the next page you will see. The top row tells you you have asked your contact to become a part of your project. If he/she accepts, he/she will join the project; and if not, they won't.
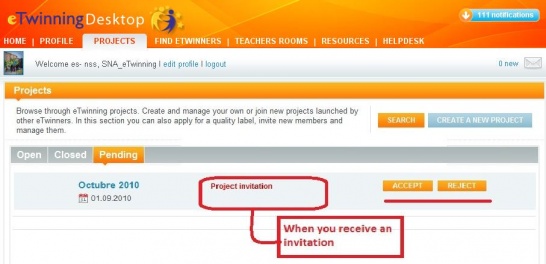
6.- The teacher you have sent the proposal to will receive a message, which can be accepted or rejected.
He will also have the request on the projects tab, state pending.
He can accept or reject the invitation in either of the two places.
Partners in a project: how to manage permits
There may be three kinds of partners in the same project, with different permits: founder, administrator and member. Let's see the differences.
Founding partner
The founders are the two members who registered the project in the eTwinning platform. They must come from different countries and are permanently linked to the project. This means that they can never be eliminated or eliminate themselves from the list of participants. This is the partner who is most likely to act upon an open project, and they can do so as follows:
1. Modify the project: see section 3 in this document.
2. Add new partners: in order to add a new partner, you must click on the corresponding link. The list of available contacts will open and so you can select all the partners you wish to invite. Once finished, click on 'ADD PARTNERS'. All those contacts ticked will receive a message on their desktop that they must accept or reject.
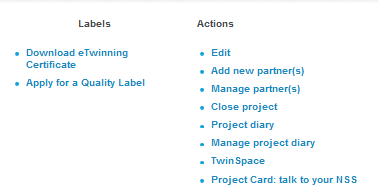
3. Partner management: when you click here, a list will open up showing all the project partners. A drop-down tab will allow you to give them the 'member' role (which is the default option) or 'administrator' role. If you click on the cross on the right-hand column, that partner will be eliminated from the project. Remember that founding members cannot have their role changed and cannot be eliminated from the project.
4. Close or reopen a project: see section 5 of this document.
5. Manage the Progress Blog (Twinblog): see units 5 and 6.
6. Access TwinSpace: see Units 5 and 6.
7. Request a Quality Label: see section 4 of this document.
IMPORTANT: As a founder member cannot be eliminated from a project, should anyone decide to give up, the other members will have to choose between two options: continue without the founder, although his/her name will continue to appear, or start a new project using the same name. Should you choose the second option, participants can keep working on the old project temporarily until the new one is approved.
Administrator partner
Administrator partners have similar permits as the founders, but they can eliminate themselves or be eliminated from a project. As we can see in the following image, they cannot manage other members' permits; that is to say, they cannot change the administrator or member roles or eliminate a participant, although they can invite new partners.
Member partner
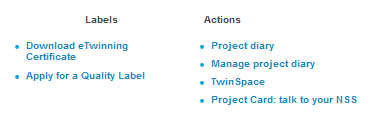
The member role is given to a new partner by default. As we can see, they cannot modify the project, close it or manage partners. They cannot manage the Progress Blog (Twinblog), although they can publish in it (we shall be studying the Progress Blog - Twinblog - in other units). Permission is kept to request a Quality Label and access to TwinSpace.
The partner-member role can be suitable for teachers who may make specific contributions to certain aspects of the project or who, for any reason, do not wish to have a higher status. However, in a collaborative project, trust amongst members is essential and the project should be managed by everyone so, under normal circumstances, the founder and administrator roles should be the most common ones.
How to modify an open project
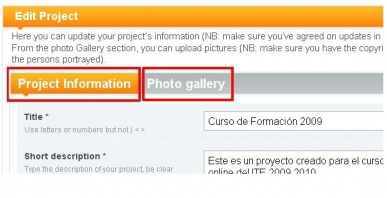
Founder and administrator partners can edit and change any aspect of the open project, both regarding the initial information given when registered and adding or eliminating images. In order to make these changes, you should click on 'Edit' in the 'My projects' section on the desktop, making sure you are doing it on the specific project you want to change.
Once there, we can choose between modifying the registration form or the photo gallery:
If we are going to change the form, we will see all the initial information we inserted. We should check it, change anything we like and then click on at the end of the form. If the changes have been saved correctly, we shall see the following message at the beginning of the form:
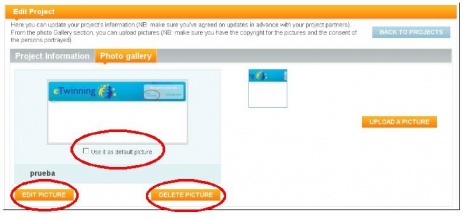
If we decide to change the image gallery, we shall see the images in gallery form and we will have three options for each one: activate (or deactivate) an image as default image; modify it or eliminate it. Also, we can upload new images onto the gallery
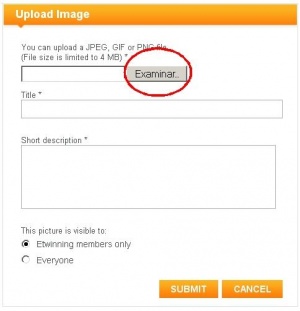
Should we decide to modify it, what we can change is its privacy status (for all of them or just for registered eTwinning users), the title or the description. If you are going to upload a new image, click on the corresponding button and a dialog will appear, similar to the one we saw when we registered the project.
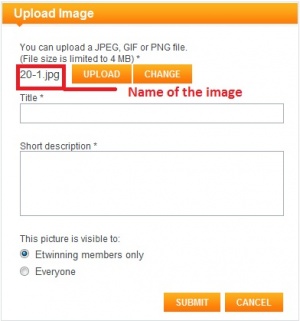
Once selected the image, we click on TELECARGAR and complete the fields.
How to apply for a Quality Label
First of all, there are some main aspects you must bear in mind when requesting a Quality Label. In the first place, it is not so much the idea of the project itself that is assessed, as is its development and final results. That is to say, you should request the label when the project has been completed or is in its last stage. On the other hand, the application form must become a guide for examiners to correctly understand the project and so they can access the results. That is to say, if the teacher makes an assessment of the project, for instance, instead of trying to condense it in the corresponding box, he or she should write an assessment document, attach it to the form or upload it onto TwinSpace, and explain where it can be found. In addition, should there be any restricted-access documents you believe to be important for a correct assessment of the project, you can send the SNA some access keys to allow others to see these documents.
The assessment criteria on your desktop are common to all eTwinning member countries, although they may be subject to certain national modifications in terms of their application. To see the exact criteria used in Spain, please go to National Quality Label. Once requested, your project will be assessed by the SNA and eTwinning representatives in your County. The final decision will appear on your desktop and you will receive an e-mail stating the conclusions of the assessment and - if appropriate - adding some proposals for improvement. Should your application be rejected, remember you can apply for the Label again for one project as many times as you wish.
Now let's see the steps of the process.
Access the eTwinning platform (www.etwinning.es o www.etwinning.net) with your user name and password.
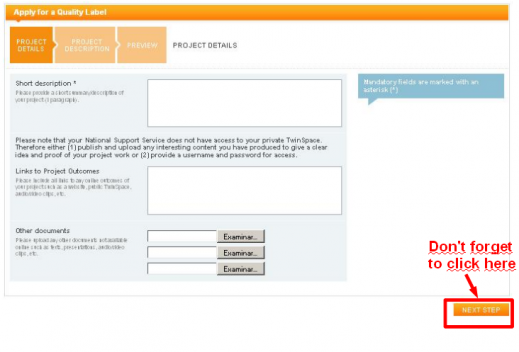
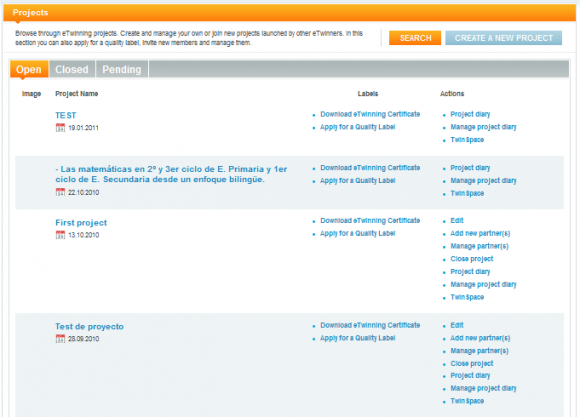
Select My projects and click on Apply for a Quality Label.
You will see a form with 3 steps that you have to fill in, stating the different aspects of your project:
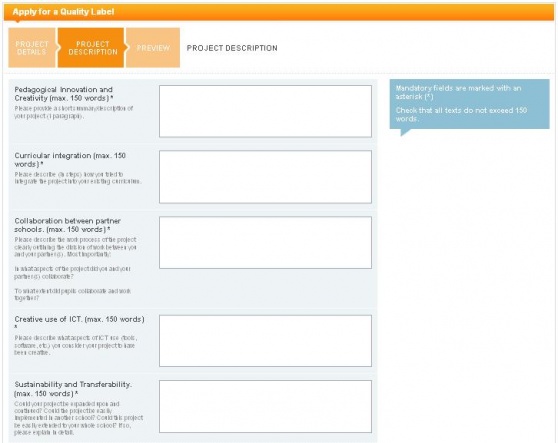
In step 2 you must describe your project:
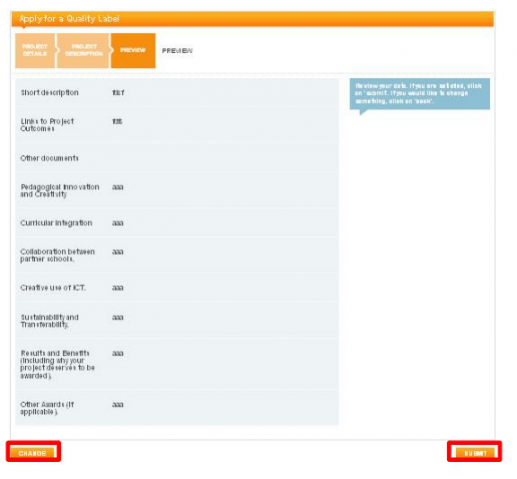
When clicking on you will see the full form:
Now click on Send and your request for a Quality Label will be processed. Click on Modify if you wish to change some data.
How to close and reopen a project
1.- Access your Desktop with your user name and password and click on 'Projects'.
2.- You will see a page where all the projects are listed:
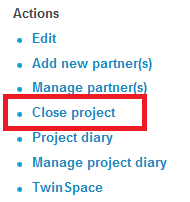
3.- Notice that on the right column ('Actions) there are different options to choose from. Now click on 'Close project''.
The system will return this message:
4.- You have now closed the project. Now, the list of possible actions is:
Even though the project is closed, all the material made public on TwinSpace will continue to be accessible, but won't be modifiable. In order to reopen it, just click on the corresponding order.
Project cards: speak to your National Support Service
Project cards are a tool for direct communication with the National Support Service. When a teacher writes the first message, the project is assigned to a member of the NSS who, from that moment onward, will be in charge of following up and replying to all the posts.
Through these cards - whose management is similar to that of the teacher’s Desktop Diary - the teacher can follow up all the key stages in the project development and mainly request advice about the work carried out, both from a technical and pedagogical point of view. The NSS will try to solve any doubts that may arise.
The project card system is a private communication channel. Only the teacher-author and his/her NSS can access the system. If you wish to know how it works, you can read and/or download this tutorial.
The documents in this section can be summarised as follows:
Back to Unit 4
