Documents 3.b: Registration
From eTwinning
Back to Unit 3
In this unit we will learn about those relevant aspects regarding registration in the eTwinning directory and how to use the sections of the eTwinning desktop.
Contents |
Registration in eTwinning
The first action we must carry out to take part in eTwinning is to register in the SCA site, www.etwinning.net (remember that you can also access using the direct link from the SNA site www.etwinning.es).
Registration in the eTwinning directory involves:
- Becoming a member of a group of European teachers who are interested in getting in touch to start collaborative work.
- Being able to access a virtual platform called eTwinning desktop, using tools that will allow us to create and manage eTwinning projects.
- Being able to take part in the online training modules.
- Starting or taking part in eTwinning groups and teacher communities as a place to exchange ideas, information and experiences and discuss common topics.
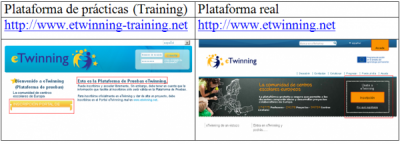
The registration process on the platform of practice is the same as in real and consists of three steps: pre-registration, pre-registration confirmation and registration.
Describing these steps now:
Pre-registration
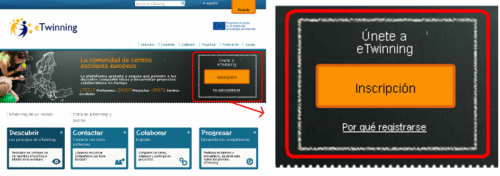
Access the eTwinning SCA site, http://www.etwinning.net (or a practice platform/training http://training.etwinning.net), and click on 'Registration'.
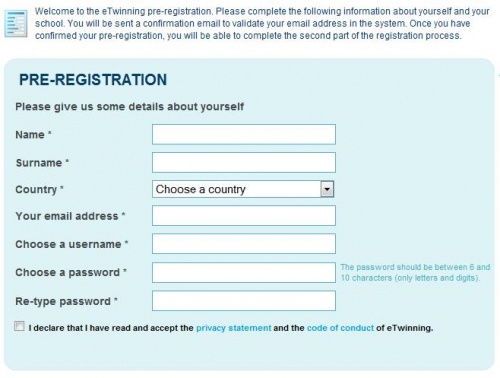
You will see the pre-registration screen, where we are asked to fill in some compulsory basic personal details: name, surname, e-mail address, user name and password.
Should the user name have already been taken, a message would pop up, asking us to choose another one. It is important to remember the user name and password, as you will be using them frequently.
Pre-registration confirmation
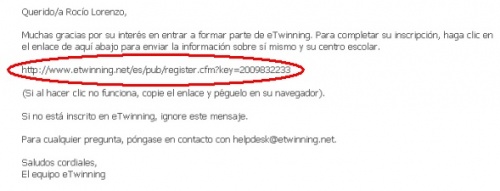
Once we have clicked 'Send', the pre-registration data will be saved and we will receive an e-mail at the address we provided.
Within this e-mail, there is a link to confirm pre-registration.
IMPORTANT: Your e-mail server may classify the confirmation message as 'spam'. If, after a few minutes, you still have not received it, you must get in touch with the National Support Service (asistencia@etwinning.es) and let them know. Include the data you used for pre-registration.
Registration
When clicking on the link we received by e-mail, we can see another window where we must fill in several forms:
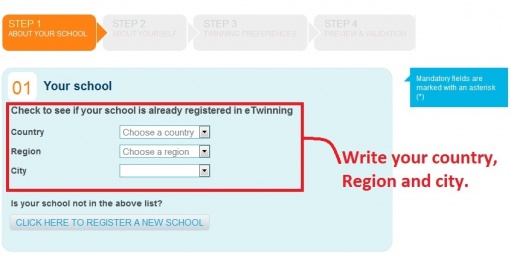
- Step 1: Information about your school. In this section we will be asked to provide data about our school.
Our school can already be registered in eTwinning, if another colleague has previously done it. The first information we are asked to give are data about our country, county and city:
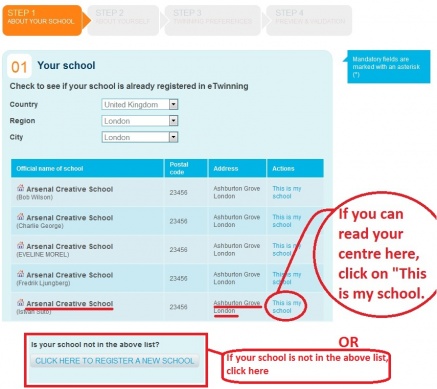
- We can now see a list of all the schools registered in the eTwinning programme in that town. Should our school be one of them, we can then click on 'This is my school' and that will take us to step 2.
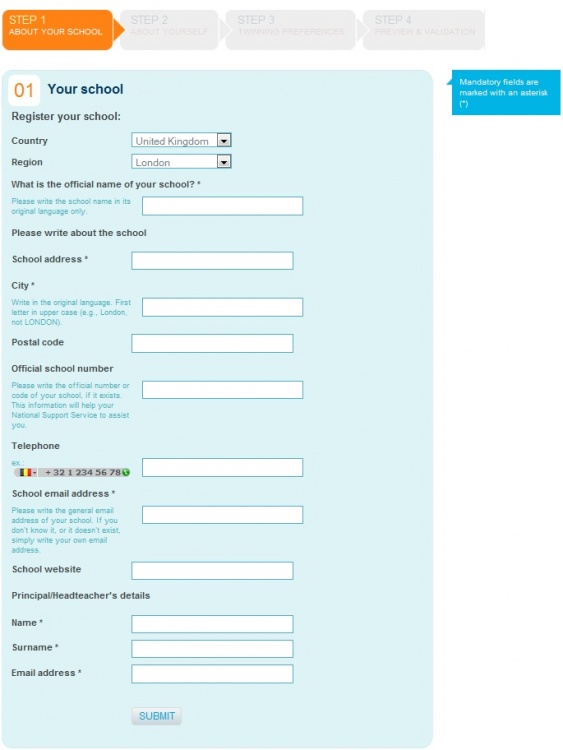
- If not, we can click on a button at the bottom of the list, 'Click here to register a new school', and we will see a form where we are asked about our school.
The data to be provided are: institutional name, address, city, postcode (not compulsory), school code (not compulsory), telephone number (not compulsory), e-mail, website (not compulsory) and the full name and e-mail of the Headmaster or Head of Studies of our school.
Some of these data are compulsory but we may not know them. After registration it is possible to modify anything, so in this case we could use false data in the registration and then change them to the real data when we find out what they are.
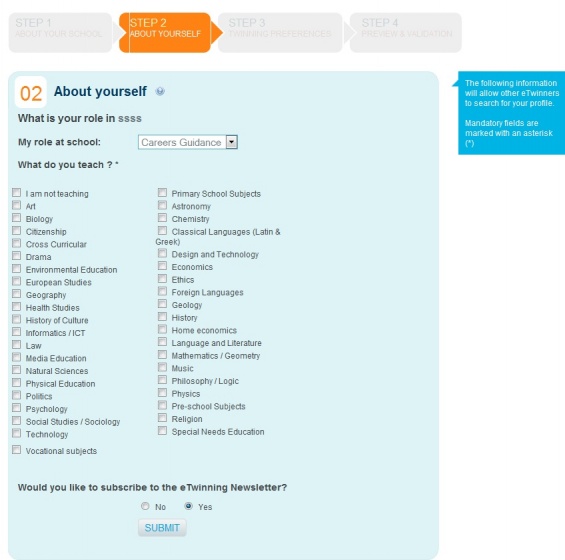
- Step 2: Information about you. In this step we can see a form asking us about our position at the school, the subjects we teach and whether we wish the eTwinning news bulletin to be sent to our e-mails*.
*NB: do not confuse the European bulletin with the national one
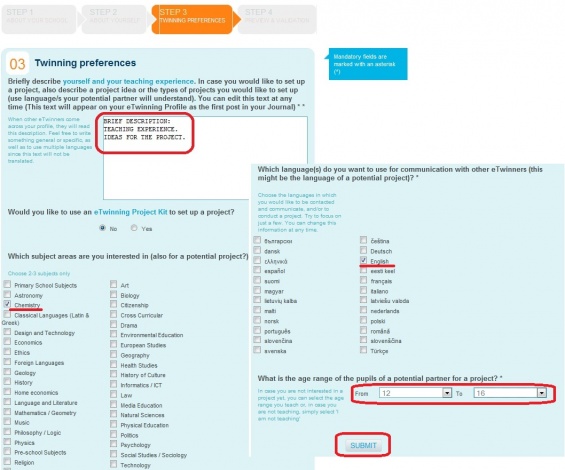
- Step 3: Twinning preferences. In this form, we are asked questions about the topics we are interested in and to make a brief description about our preferences.
The fields in this form are:
- eTwinning project kit. We must remember that these kits have projects prepared to be practiced with straight away, which would help with the creation of the project. If the answer is affirmative, a list would appear to choose the type of kit.
- Ideas for an eTwinning project. It is advisable to express these ideas in all the languages you can speak in to your partner, as they will be reading them. Should this take up too much space, write them in your favourite language and add a short summary in the other languages. And do not forget that Spanish is becoming increasingly popular as a foreign language in Europe.
- Fields of knowledge for the project. Only 2 or 3 subjects should be chosen so that our preferences are concisely specified.
- Languages to be used in the project.
- Age range of the students taking part in the project.
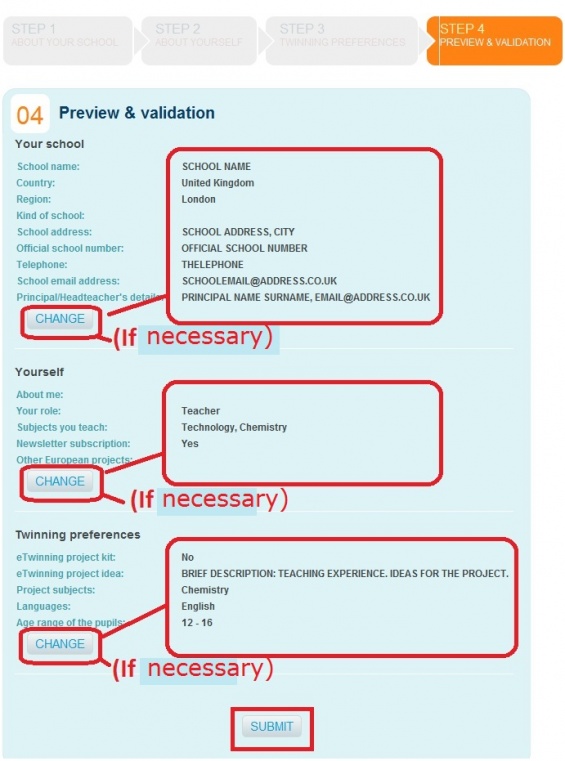
- Step 4: Preview and confirmation. In this step we have all the information we added in the previous steps, also allowing us to modify any incorrect data.
If the data are correct, click 'Send'. If any data were wrong, we could click 'Modify' in the corresponding step.
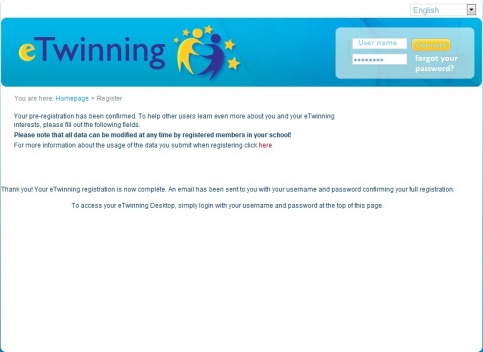
Once the data are confirmed in Step 4, we will have completed our registration in eTwinning and a message will come up to confirm it.
From now on, we can access the 'eTwinning Desktop' virtual space by using the user name and password used in the registration process.
| Back to Unit 3 | Next: Documents 3.c: Desktop |
